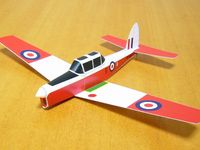
Yuki's Flying Card Models
http://www2u.biglobe.ne.jp/~poseidon/
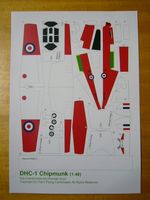
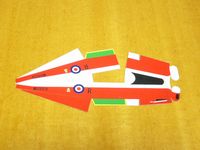
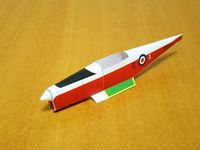
DHC-1 Chipmunk
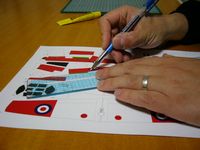
 To build flying models, it is recommended to use index or card weight paper (approximately 110 - 135 kg), which is much heavier than the normal paper you usually print with. When you use heavier paper, the planes will be more rigid and the wings will not flop around as much. Be careful before feeding heavy paper through your printer. Some printers do not support the use of heavy card stock paper. You'll want to check your printer manual before purchasing this type of paper.
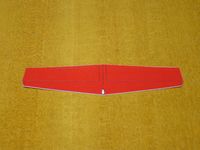
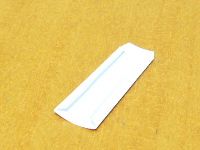
STEP 1: Wing
 Remember to score all dashed lines before beginning to cut and assemble your model.
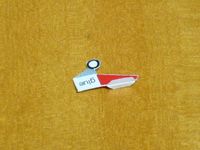
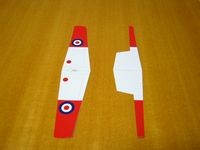 Cut out part #1 and #4 as shown in the right picture.
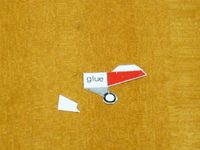
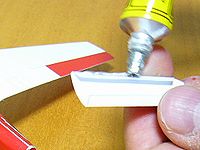
 Rotate part #1 as shown with the printed side down and coat with the glue.
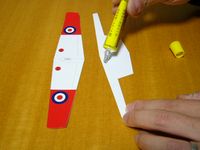
 Place the wing on a flat surface, glue part #1 and #4 together and smooth out glue. Weight down so that the glued wing dries flat.
 When glue is thoroughly dry, score all dashed lines.
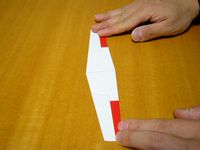
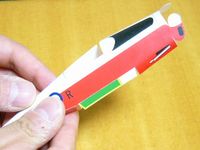
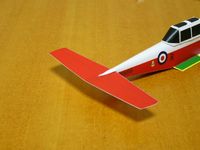
 Bend up along the scored dashed line for dihedral.
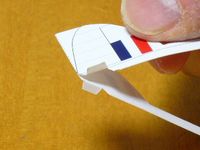
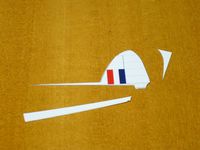
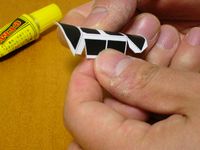
Step 2: Vertical Stabilizer
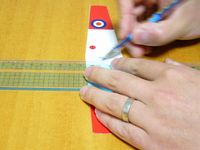
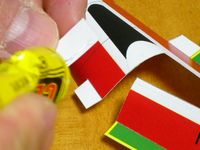
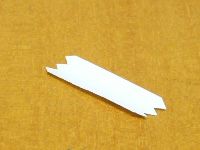
 Cut out part #13 as shown in the right picture.
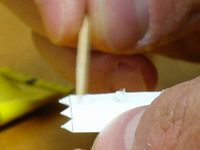
 Score all dashed lines and fold two tabs along the scored dashed line. Rotate the part as shown with the printed side down. Coat one side surface with the glue and fold it down onto the other half. Be sure not to get any glue on the tabs attached to the two halves.
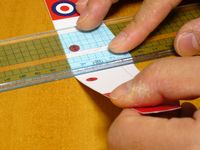
 When glue is thoroughly dry, cut out white space as shown in the right picture.
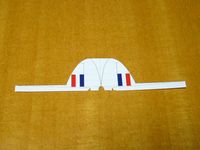
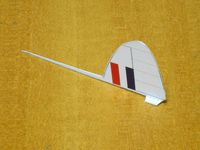 Open out the two tabs so they are flat on the bottom.
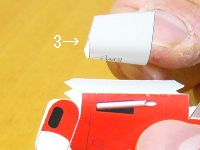
STEP 3: Canopy
 Cut out part #2 as shown in the right picture.
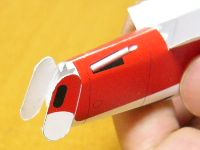
 Curl - do not fold canopy - the front, center and back panels as shown in the right picture.
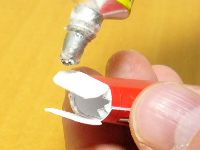
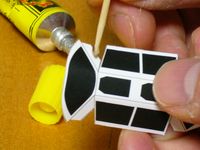 Run a line of glue along the white area of the part. Tooth pick is useful for placing glue on narrow area.
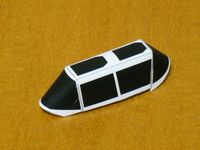 The canopy is completed.
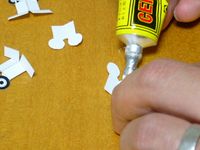
STEP 4: Landing Gear
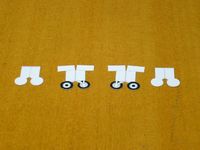 Cut out part #11, #12, #18 and #19. And score all dashed lines.
 Rotate the part as shown with the printed side down. Coat one side surface with the glue and fold it down onto the other half. Be sure not to get any glue on the tabs attached to the two halves.
 Glue part #11 to #18 together. Glue part #12 to #19 together as shown in the right picture.
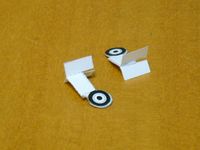 The main landing gear is completed.
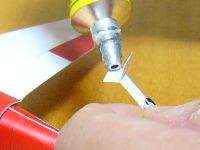
 Cut out part #14 as shown in the right picture.
 Score all dashed lines and fold two tabs along the scored dashed line. Rotate the part as shown with the printed side down. Coat one side surface with the glue and fold it down onto the other half. Be sure not to get any glue on the tabs attached to the two halves.
 When glue is thoroughly dry, cut out white space as shown in the right picture.
 The tail wheel is completed.
STEP 5: STEP 6: Fuselage
 Cut out part #21 and curl the part as shown in the right picture.
 Coat one side surface with the glue and roll the part into a tight roll as shown in the right picture. Rubber band is helpful to fasten the rolled part until glue is thoroughly dry.
 Cut out part #7 as shown in the right picture.
 Curl the nose and fuselage of the part as shown in the right picture.
 Cut out part #9 and run a line of glue on the half of it.
 Glue the part #9 to the part #7 as shown in the right picture.
 Run a line of glue on the another half of the part #9. Glue the part #9 to #7 as shown in the right picture.
 Form the part into a tube that is flat on the bottom. Glue together with a line of glue along the tab.
 Cut out part #6 and rotate the part as shown with the printed side down. Curl the part up as shown in the right picture.
 Run a line of glue on the half of it.
 Glue the part #6 to the part #7 as shown in the right picture.
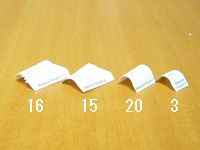 Cut out part #16, #15, #20 and #3 and curl them as shown in the right picture.
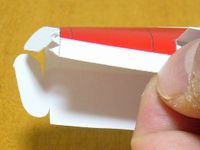
 Coat one side surface of part #16 with the glue. Glue the part #16 inside of the nose as shown in the right picture.
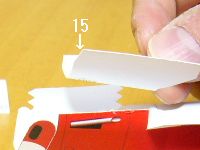 Coat one side surface of part #15 with the glue. Glue the part #15 inside of the nose as shown in the right picture.
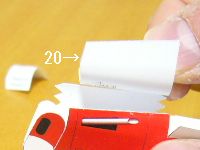 Coat one side surface of part #20 with the glue. Glue the part #20 inside of the nose as shown in the right picture.
 Coat one side surface of part #3 with the glue. Glue the part #3 inside of the nose as shown in the right picture.
 Run a line of glue on the another half of the part #6. Form the part into a tube and glue together with a line of glue as shown in the right picture.
 Put a line of glue on the no-printed tab and along the triangular shaped tabs.
 Glue tabs as shown in the right picture.
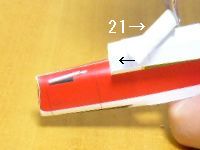 Run a line of glue on the part #21. Insert the part and glue inside of the nose as shown in the right picture.
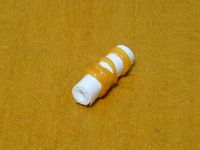
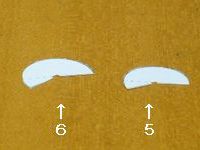 Cut out part #5 and #6. Form the part into a cone.
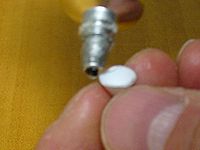 Glue part #5 to #6 together. Put glue on the edge of the spinner as shown in the right picture.
 Glue the spinner to the nose as shown in the right picture.
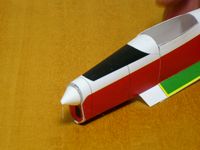
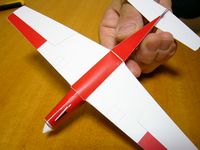
 The fuselage is complete.
STEP 6: Final Assembly
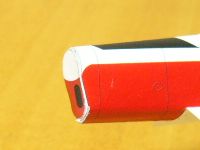
 Run a line of glue around the inside of the canopy. Glue the canopy to the fuselage in the area indicated on the printouts.
 Cut out part #17 as shown in the right picture.
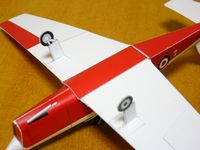
 Slide the horizontal stabilizer and the fuselage together.
 To fix the horizontal stabilizer, run a line of glue along the fuselage.
 Place glue on the tabs and white area of the tail wheel indicated in the area indicated on the printouts. Attach the tail wheel to the end of the fuselage.
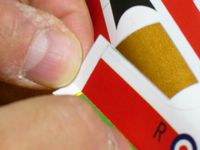
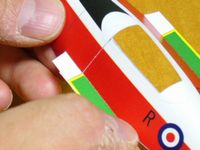
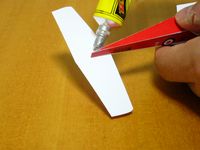
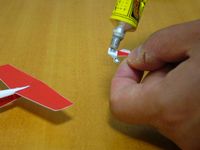
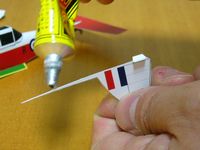 Put glue on the tabs and edge of the vertical stabilizer as shown in the right picture.
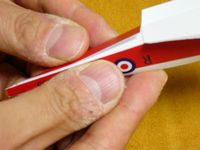
 Attach the vertical stabilizer to the fuselage as shown in the right picture.
 Run a line of glue on the tabs.
 Glue fuselage and wing together with a line of glue along the tab.
 Cut out part #10 and rotate the part as shown with the printed side down. Curl the part up and fold two tabs along the scored dashed line as shown in the righ picture.
 Run a line of glue on the tabs as shown in the right picture.
 Glue the part #10 to the lower side of the fuselage as shown in the right picture.
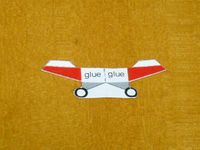
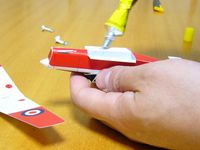
 Run a line of glue around the inside of the main landing gear.
 Glue the main landing gear to the lower side of the wing in the area indicated on the printouts.
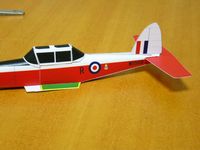
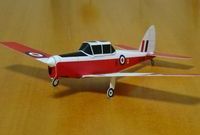 Your DHC-1 Chipmunk is now complete!
PR: Äqŗ¤Åµé╣Ä®ō]ÄįWeb-ē┐ŖiéŌŗ@ö\é┼öõŖr- |
ōdō«āAāVāXāgÄ®ō]ÄįWeb-ē┐ŖiéŌŗ@ö\é┼öõŖr- |
Ä®ō]ÄįĢ█ī» |
É▄éĶéĮéĮé▌Ä®ō]ÄįüĢāXāéü[āŗāoāCāNWeb-ē┐ŖiéŌŗ@ö\é┼öõŖr- |
ōVæ╠¢]ēōŗŠWeb-ōVæ╠¢]ēōŗŠé╠æIéčĢ¹ |
MTB ā}āEāōāeāōāoāCāNöõŖrWeb